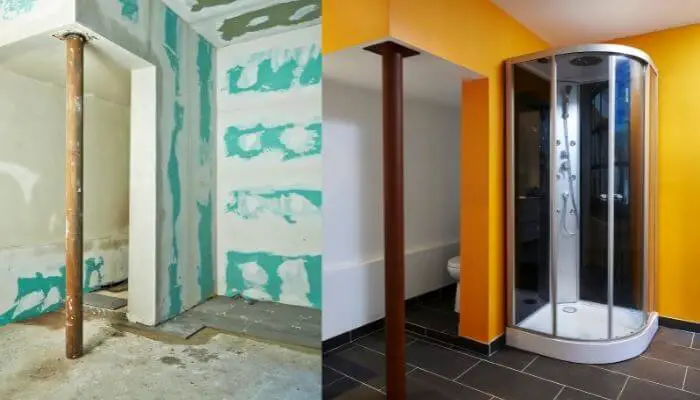
Waterproofing shower walls prior to tiling over the plasterboard is a very good idea as it helps prolong the lifespan of your bathroom by minimizing the risk of damp and leaks.
Why It Is Important To Waterproof Shower Walls Before Tiling
The International Residential Code (IRC) of 2018 has minimum regulations on how houses are built. This includes your shower walls.
The need to waterproof shower walls isn’t only to save you money and time in the long run, but also to ensure that you’re following certain building codes which will improve the longevity of your home.
If your shower walls aren’t properly waterproofed mildew and mold will accumulate.
Waterproof and water-resistant materials are two totally different things.
When we say waterproof, we mean your substrate should stay as dry as the Sahara desert for a long time.
The best way to combat damp problems before they happen is to use waterproof materials on your shower walls before tiling.
How To Waterproof Your Shower Walls Before You Tile
Thanks to advanced technologies, waterproofing showers has never been easier:
Method 1: Using Waterproof Membranes
Waterproof membranes can be divided into two types: sheet membranes and liquid membranes.
Both types of waterproof membranes are designed to be easily tiled over.
Sheet Membranes
Sheet membranes are one of the popular choices when waterproofing shower walls.
They’re made from a mixture of plastic compounds.
Because they’re sheets, they work using the “peel and stick” method.
For the installation, you’ll need a few steps of preparation before diving into the waterproofing part.
Required tools are:
- Gloves and goggles (for protection)
- Protective sheets
- Paint roller or brush
- Paint tray
- Chosen primer
- Measuring tool
- Cutter
- Sheet membranes
To install your sheet membranes follow these steps:
- Preparation and Protection
Before everything else, make sure your other surfaces and fixtures are secured using protective sheets.
This can save you time from cleaning up any unexpected stains afterward.
It’s also important to wear a pair of gloves and goggles since the chemicals from the materials can irritate your eyes and skin.
- Application of Primer
Now that you’re all set, it’s time to coat your walls with a primer.
A layer of primer prepares your wall to receive a coating and act as an extra adhesive between the membrane and the substrate.
At this stage, make sure your substrate is clean and dry.
Then, with your brush or roller, apply a coat of primer starting from the top to the bottom, making sure each corner is completely covered.
- Application of Sheet Membrane for the Corners
If your shower walls have a lot of corners, you should take care of corner detailing first.
Oftentimes, some corners are still exposed.
They become vulnerable to moisture and water exposure.
To solve this, cut small portions from your sheet membrane.
Use these to cover corner junctions and make sure that there’s no opening for any water to seep through.
For better sealing, cut more portions of the sheet in triangles to ensure proper detailing.
- Application of Sheet Membrane for the Walls
First, measure the size of your shower wall and cut the same measurement from your adhesive sheets.
Then, mark your walls where you’re installing the sheets.
This guide can make your installation much faster and easier.
Slightly remove the backing from your sheets, just enough to stick on the wall, and gently apply your sheet.
Once you’ve made sure that the membrane is fitted for the wall, remove the backing film and stick the membrane onto the wall.
Make sure to apply pressure while doing so to avoid air pockets.
When applying more sheets, try to overlap them at least 50 mm to prevent any gaps.
These lap joints should be completely stuck on one another to avoid any problems.
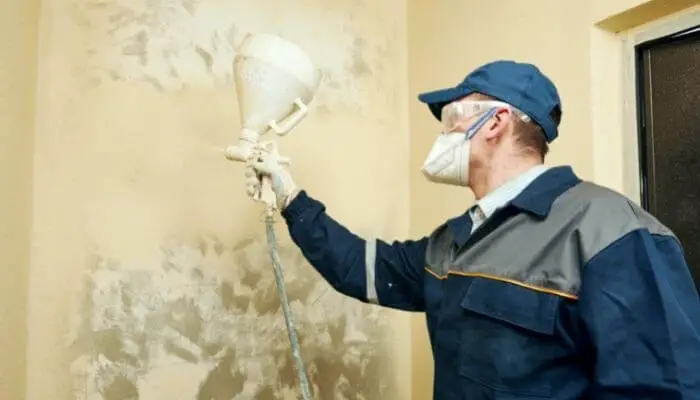
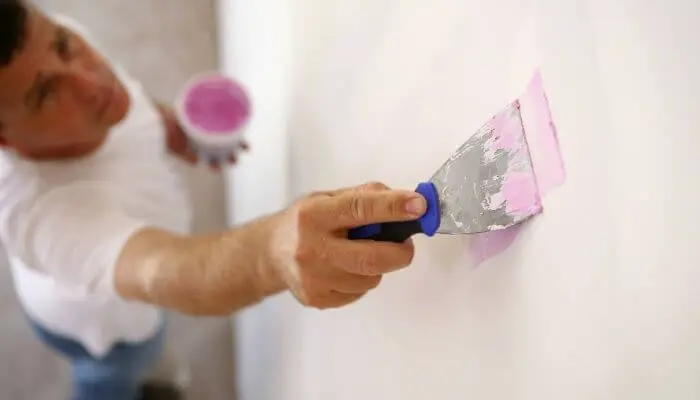
Liquid Membranes
Liquid membranes are a type of waterproof membranes in paint form.
They offer versatility when it comes to waterproofing.
More often than not, liquid membranes are supplemented with reinforcing tapes to make sure they’re fail-safe.
If applied correctly, they’re the cheapest method to waterproof your shower walls.
They even require a lot less effort than sheet membranes.
The things you’ll need are:
- Paint roller or brush
- Paint tray (optional)
- Protective sheets
- Wet film thickness gauge
- Liquid membrane
To apply your liquid membrane, these are the steps:
- Preparation and Protection
As with any project, you’ll need to prepare your site and protect yourself from possible irritants.
Cover the surfaces and fixtures that you don’t want the liquid membrane on.
- Application of Liquid Membrane
With your paint roller or brush, paint your shower walls with the liquid membrane as you would with regular paint.
Depending on the brand of your liquid membrane, some may take you at least two coats to achieve the right thickness.
You can use your wet film thickness gauge for this.
When it comes to drying your membrane, the weather has a huge effect.
On warmer days, you can expect a faster drying time, and up to several hours on colder days.
Lastly, you should wait for at least 12 hours for the liquid membrane to cure.
Method 2: Using Foam Board Systems
Foam boards are usually a set of kits that can act as wall panels as well as a waterproofing system.
Since they’re always sold as a set, this type of waterproofing system can be a little pricey.
Although they can be quick to install and recommended for beginners, foam boards come in limited shapes and sizes.
To better fit your shower walls, trimming may be necessary.
Foam board systems typically use:
- Wall panels
- Rust-resistant screws
- Sealant
- Fiberglass tape or strips waterproof membrane
To install your foam board system, follow these steps:
- Placing Wall Panels
To start, place your wall panels accordingly.
These should already be cut based on the size and shape of your walls.
After installing the panels, apply a generous amount of sealant on the joints, from the bottom to the top.
This is to secure those seams where water can penetrate.
- Fastening screws
Use a screw fastener to lock screws onto the panel and attach them securely.
The pressure should just be enough to drive the screws into the panel until they’re flat on the board.
- Application of Sealant
Apply more sealant on other seams and on top of the screws.
This protects the screws from water and becomes an added precautionary waterproofing system.
- Addition of Tape
Lastly, add a layer of fiberglass tape or a strip of membrane on top of the sealants. This further protects the seams from moisture.
Final Thoughts
Regardless of how you decide to waterproof your shower walls, the end goal is to create a durable barrier between your tiles and walls.
Remember to think about what your shower really needs.
It could be as simple as using membranes or as easy as installing panels.
At the end of the day, you want your waterproofing system to stand the test of time.
