LED lights are practical and stylish, which is why their popularity has spread so quickly.
Some people like to take it to the next level by putting LED lights in their gardens, particularly at Christmas. But that brings you one thing to worry about: moisture.
Lucky for you, there are several ways to waterproof LED lights.
We’ve gathered the three best methods, and it’s up to you to decide which one is best for you.

We’ll cover each method’s pros, cons, costs, and steps below.
The Different Levels of Resistance
Before we get to the actual process of waterproofing your LED lights, we need to explain the different levels of resistance because each method offers a certain level of resistance.
When it comes to LED lights, their resistance is measured by two numbers and two letters: IP65.
IP stands for “ingress protection,” which is the level of protection the LED lights come with. Most LED lights use ingress protection.
The number six represents solid protection, which is protection against solid objects like dust. When it comes to dust, the levels range from one to six.
The number five represents the level of water protection. The levels range from one to 9k, so five is a decent grade.
How do you know what each level means? First, take a look at the IP chart below:

Each method of waterproofing your LED lights comes with a certain level of protection.
This helps you better understand what your LED lights will endure if you use that method.
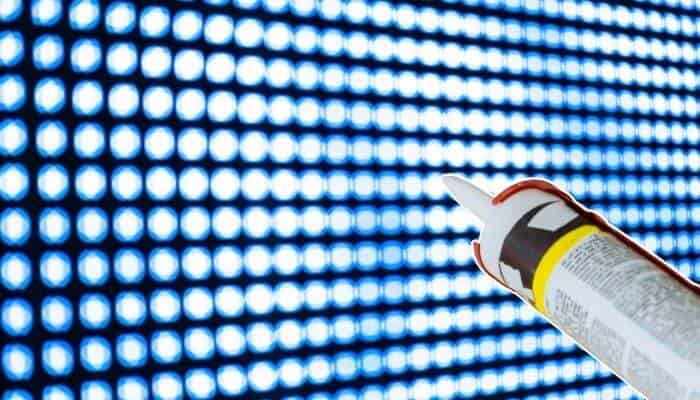
1. Use Silicone Sealant
Since silicone resembles plastic, it keeps dust and water off your LED lights. In addition, the sealant acts as an extra protective layer.
Using silicone is great because, unlike other sealants, the color will remain transparent and won’t turn yellow.
Silicone also withstands temperatures from -40 to 220 celsius.
The only con is that it is a relatively pricier alternative for waterproofing your LED lights.
So, let’s get to how you apply the sealant!
You’ll need:
- A scraper
- Silicone sealant
- Brush
- Prep the LED lights by brushing off any dust or germs.
- Silicone sealants come in a convenient tube with a nozzle. So, all you need to do is squeeze out the sealant on the LED lights.
- Make sure to cover the edges.
- Scrape out any excess silicone from the edges of the LED lights with the scraper.
- Leave the LED lights in a safe place for 24 hours while the silicone cures.
- Enjoy your waterproof LED lights!
Using a silicone sealant offers IP62 protection. This means that in regards to dust, the sealant will provide protection against dust and touch.
As for water, the sealant will offer protection against moisture, but your LED lights won’t be completely waterproof.
They’ll only withstand sprinkles of water like rain or fog.
Recommended places for the LED lights are the kitchen, bathroom, living room, or other household areas.
If you’d like to increase the protection level, combine the silicone sleeve method and silicon sealant method to reach a level of IP67.
That way, the LED lights will be able to handle heavy rainfall.
2. Use a Silicone Sleeve
Using a silicone sleeve is probably the easiest method out of all three. They’re like phone cases for your LED lights.
Just like a silicone sealant, a silicone sleeve is long-lasting, does not change in color at all, and is eco-friendly.
However, using a silicone sleeve does not allow as much light transmission.
They offer 82% light transmission, while the silicone sealant provides 96% transmission.
The difference may not be noticeable indoors, but outdoors under the sunlight, you’ll see the difference loud and clear.
The difference is not huge, so it isn’t as noticeable. An average silicon sleeve will cost you around 1.54 dollars per foot, so depending on how long your LED lights are, you won’t have to pay as much.
You also won’t need to wait for anything to dry, so the process is much quicker.
So, let’s get to how you apply the sleeve!
- Place the LED lights inside the sleeve
- Close the sleeve with the caps on the edges to cover the LED lights completely.
- That’s it!
The process is that simple. Silicone sleeves offer IP65 protection. This means that they can withstand touch, dust, and water. The LED lights will survive any water splashes you throw their way.
However, since the case does not perfectly fit the LED lights as a sealant would, it would not withstand pressure washing or outdoor areas.
So, it is recommended to keep the lights indoors.
If you’d like to use the LED lights outdoors, like on the beach or on a cruise, combine both the sealant and sleeve method.
The perfect fit and the extra protection from the sleeve will make the LED lights much more durable and long-lasting.
How do you combine both methods? Add a layer of the sealant on the LED lights, then place them in the sleeve.
Although it can be time-consuming, the extra protection is definitely worth it.
3. Use A Heat Shrink Tube
Heat shrink tubes work a lot like the sleeve method.
They’re designed to be like a case for your LED lights.
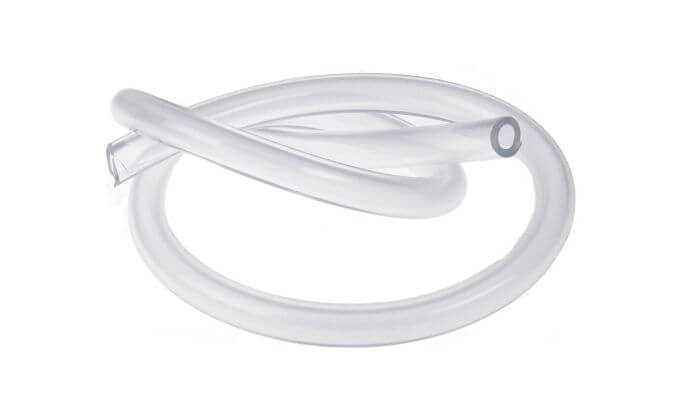
The only difference is that heat shrink tubes fit your LED lights way better since you shrink the tube with heat to fit the lights, so there’s no room inside for the water to seep or leak.
The tubes are made of polyolefin polymers, which are an eco-friendly material, rather than PVC, which is what they used to be made of.
The tube will also cost you around 0.5 dollars per foot, which is pretty affordable even if you have plenty of LED lights.
The process is a little bit more complicated than the previous two methods. So, let’s get to it!
You’ll need:
- Scissors
- Heat shrink tube
- Heat gun
Then follow these steps:
- Start by cutting the tube to fit the LED lights. Make sure to cut separate pieces for the edges as well.
- Place the LED lights in the tube.
- Use the heat gun to shrink the tube around the LED lights.
- Then, use the heat gun to shrink the edges.
- Enjoy your waterproof LED lights.
Heat shrink tubes offer a level of IP65 protection.
So, like the sleeve method, they offer protection against water splashes and dust, but not full submersion or heavy rainfall.
It’s better to keep these lights in splash zones indoors.
However, don’t use them in outdoor areas because protection is not guaranteed, especially in the winter or during a storm.
Since the fit is better with shrink tubes, this method offers more protection than the sleeve method would.
But, the case is still hollow, so the water can seep in if there’s heavy rainfall or something like that.
Final Thoughts
That’s about it when it comes to waterproofing your LED lights. All methods are very simple and easy to personalize!
As for which method you should use, it really depends on what you’ll be using your LED lights for.
If you’re using the lights for outdoor activities, then you should combine both the sealant and sleeve method.
If you are placing your lights in a splash zone indoors, like a kitchen or bathroom, you should use the heat shrink method or the sleeve method.
If you just need some extra protection for your lights, then the sealant method is best.
The three methods are relatively affordable, so you won’t break the bank in the process.
Now, it’s up to you to decide how you’ll be waterproofing your lights!